


When it’s time for a new shampoo station, the first question many salon owners ask is, "Can I do this myself?" A DIY approach can seem like a great way to save money, but a small mistake with plumbing can lead to big, expensive problems. Hiring a professional offers peace of mind but adds to the budget. The right choice depends on your skills, your timeline, and the complexity of the job. To make that decision, you need to know exactly what the project entails. This guide provides a transparent, detailed look at the entire backwash shampoo bowl installation process, helping you weigh the pros and cons and move forward wisely.
Key Takeaways
- Map It Out First: Before buying, confirm your new unit fits your workflow by measuring the space. Check that your existing plumbing is compatible and understand local codes to prevent any installation surprises.
- Prioritize Professional Plumbing: To avoid leaks and future headaches, hire a licensed plumber for the installation. At a minimum, ensure a hair trap is installed to prevent the costly clogs that can disrupt your business.
- Secure the Bowl and Keep It Clean: A proper installation isn't finished until the unit is securely mounted to the floor to prevent any wobbling. Protect your investment long-term with a simple daily cleaning routine to prevent stains and keep your station looking brand new.
Why Your Salon Needs a Backwash Shampoo Bowl
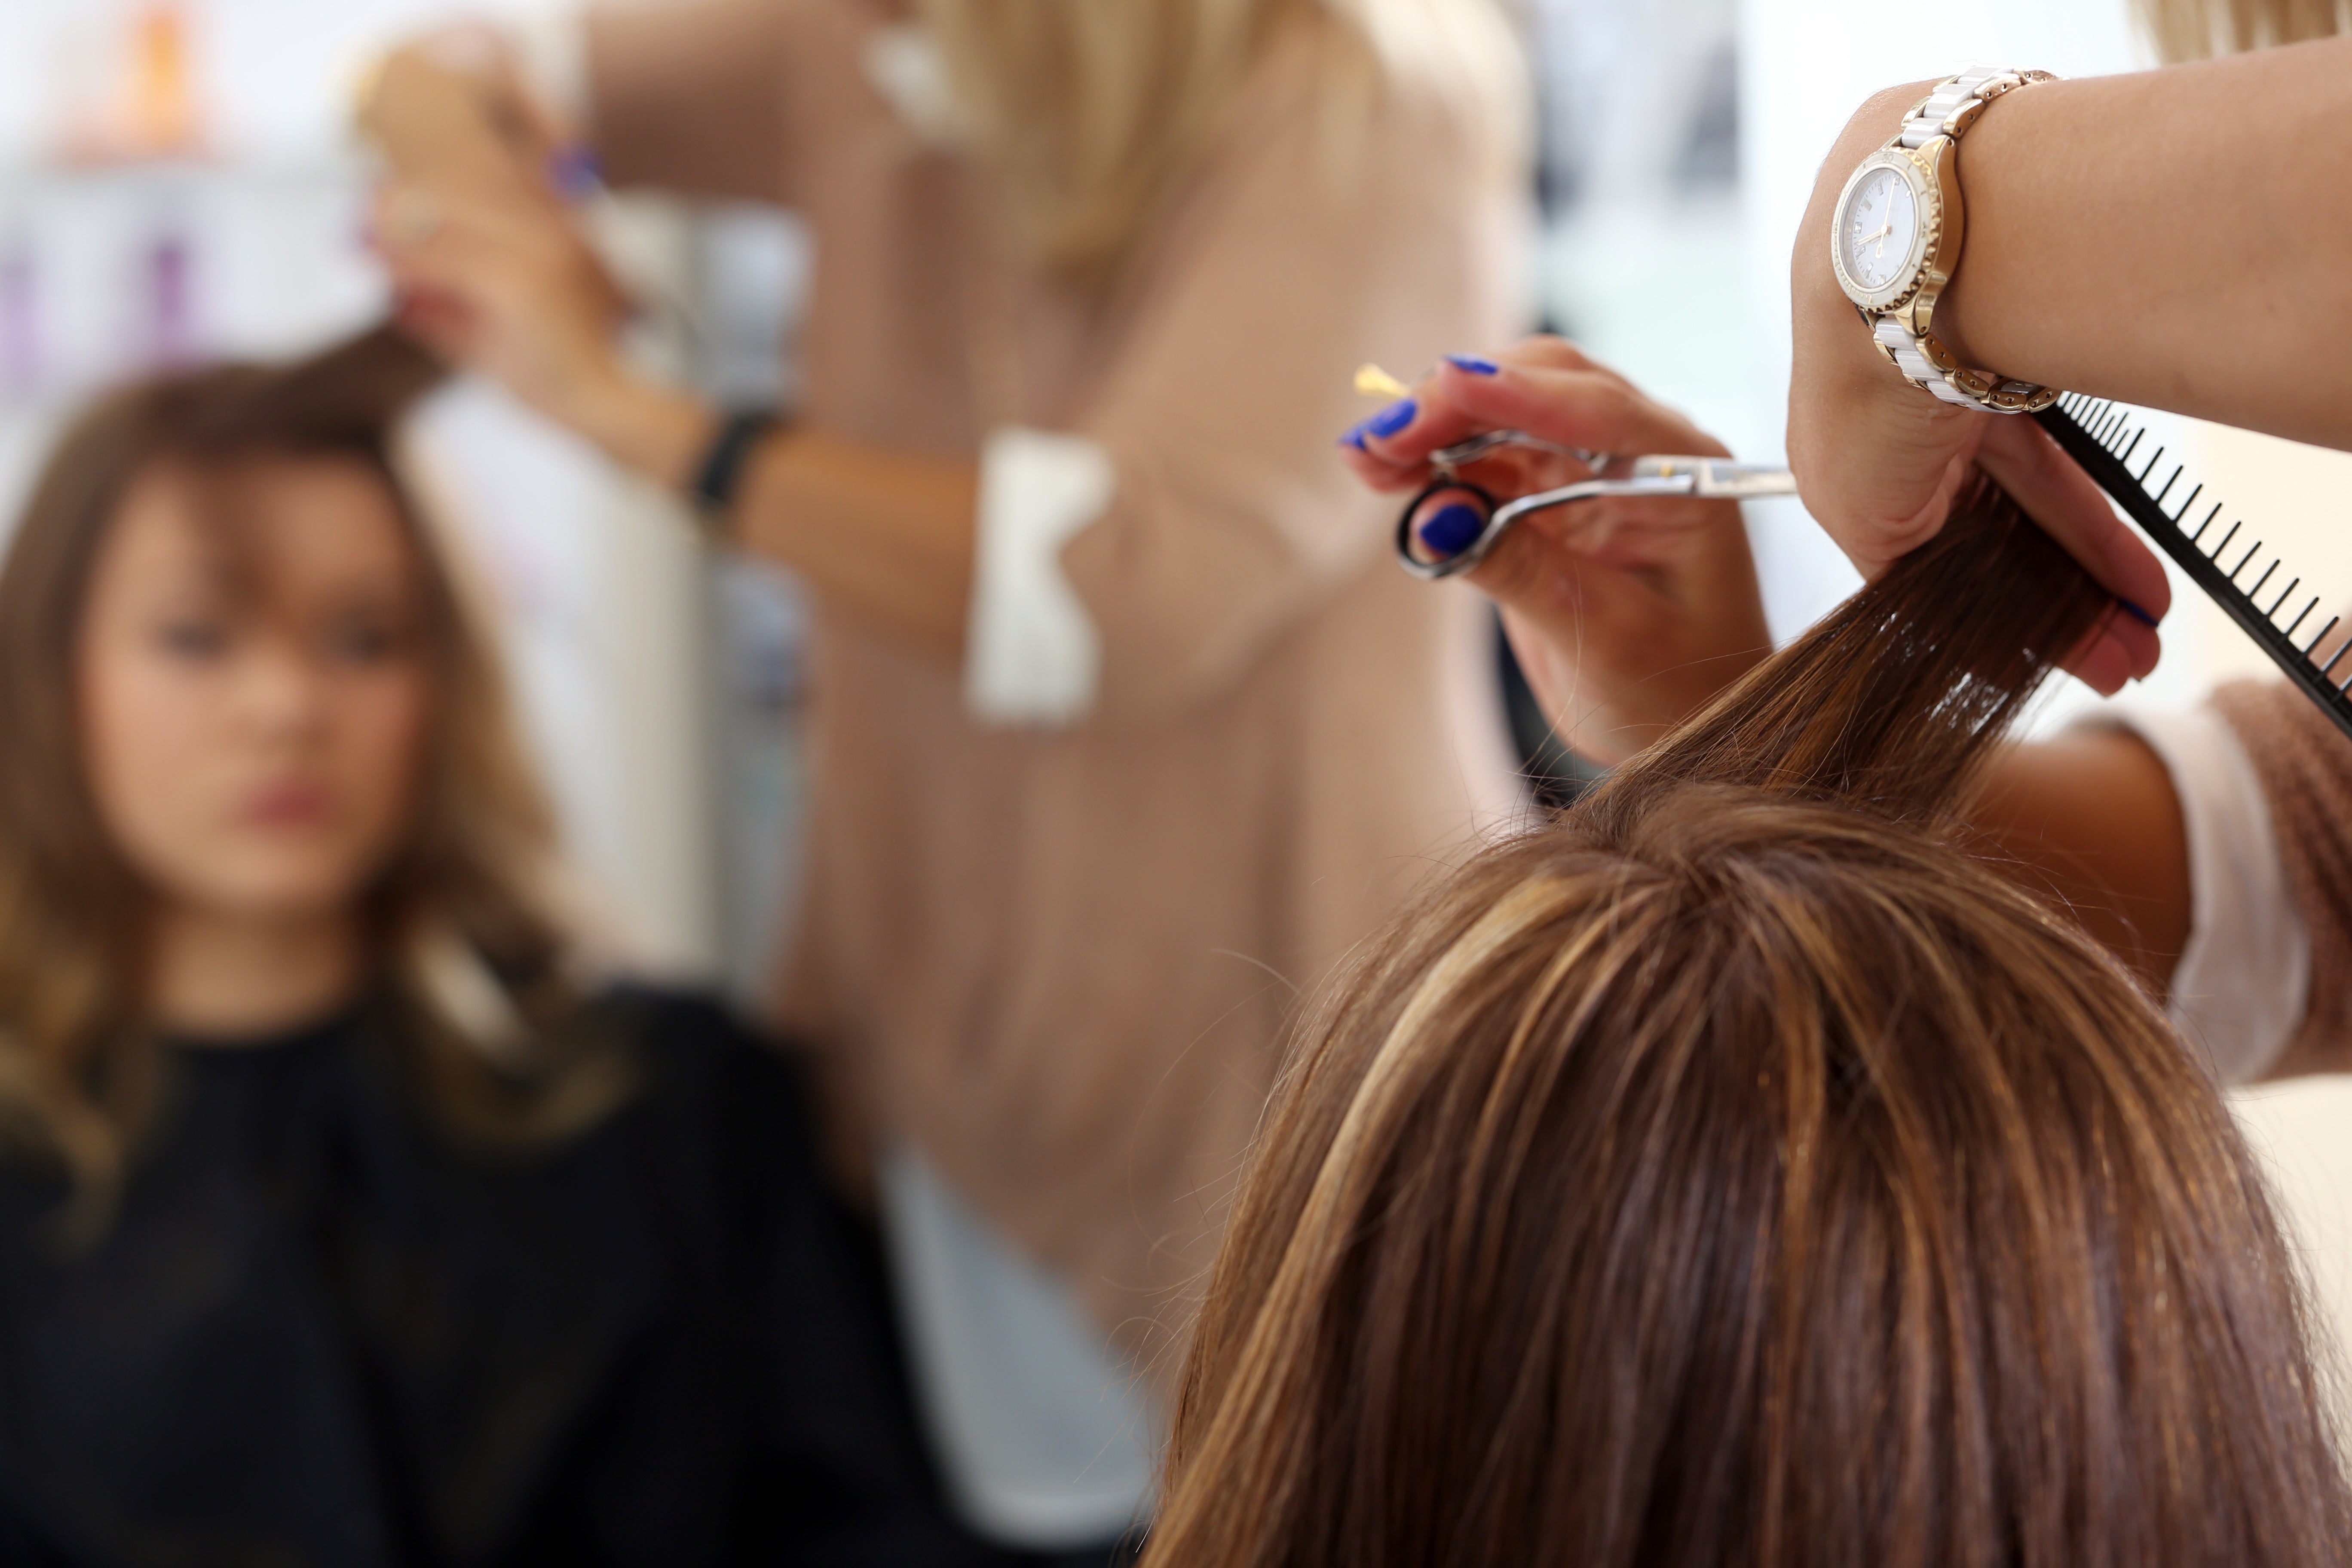
A backwash shampoo bowl is more than just a place to rinse hair—it’s a fundamental part of your salon’s experience and workflow. Think about it: the shampoo is often the first hands-on service a client receives and the last touchpoint before styling. Getting it right sets the tone for the entire appointment. A high-quality backwash unit shows your clients you value their comfort and tells your stylists you’ve invested in tools that make their job easier and more efficient. It’s a foundational piece of equipment that impacts everything from client relaxation to the speed and quality of your services.
Better Client Comfort
Let’s be honest, nobody enjoys craning their neck over a sink. A proper backwash shampoo bowl is designed to eliminate that discomfort entirely. One of the biggest perks is the immediate improvement in client comfort, especially for services that take a while, like color processing or deep conditioning treatments. Ergonomically designed shampoo units with cushioned neck rests allow your clients to fully relax without straining their neck or back. This small touch transforms a routine wash into a spa-like moment, making their visit more memorable and encouraging them to come back. When a client can truly unwind, they leave feeling pampered and cared for.
A More Efficient Salon
A well-chosen backwash unit is also a game-changer for your salon's workflow. When your station is set up for success, your stylists can work more smoothly and effectively. The right unit puts everything they need within arm's reach, from the faucet controls to product storage, cutting down on wasted time and movement between clients. This streamlined process allows for quicker turnaround times without sacrificing quality. As you plan your setup, consider your space and plumbing to ensure the bowl you choose contributes to a more organized and productive environment. This efficiency not only reduces physical strain on your team but also lets you serve more clients throughout the day.
What You'll Need for Installation
Getting your new backwash shampoo bowl set up is exciting, and a little prep work goes a long way toward a smooth installation. Before you even think about turning off the water, it’s smart to gather all your tools and materials. Having everything you need within arm’s reach will save you time and prevent those frustrating mid-project trips to the hardware store. Most of the work involves plumbing, so think of this as a checklist to make sure you’re ready to go.
Essential Tools
You don’t need a professional-grade workshop, but a few key tools are non-negotiable for this project. Start by gathering the basics that you likely already have on hand, like a tape measure for accuracy, a level to ensure everything is straight, a pencil for marking, and a utility knife. For the plumbing-specific tasks, you’ll definitely need an adjustable wrench or a set of channel-lock pliers for tightening fittings without stripping them. A drill with various bits will be necessary for mounting the unit securely to the floor or wall, and a caulk gun is essential for applying a clean, waterproof seal at the end.
Plumbing Supplies
This is where paying attention to detail really matters. Before you even purchase your dream shampoo unit, take a look at your salon’s existing plumbing. Knowing whether your pipes come from the wall or the floor will determine the type of bowl you can install. You’ll need flexible hot and cold water supply lines, a P-trap kit for the drain, and plumber’s tape to ensure leak-proof connections. Most importantly, check for a UPC-certified vacuum breaker. This device prevents contaminated water from flowing back into the clean water supply. If your bowl doesn’t include one, you’ll need to buy and install it separately.
Safety Gear
Safety should always be a priority, even for a seemingly straightforward installation. At a minimum, have a pair of safety glasses to protect your eyes from debris and a good pair of work gloves to keep your hands safe. It’s also a good idea to keep some old towels or a bucket handy to catch any water drips. Remember that vacuum breaker we just talked about? It’s not just a plumbing requirement; it’s a safety feature. Most municipal plumbing codes in the U.S. mandate an Atmospheric Type Vacuum Breaker on shampoo bowls to ensure the health and safety of everyone in the salon.
Measure Your Space
Before you fall in love with a specific shampoo unit, grab a tape measure. You need to measure carefully, thinking about how stylists and clients will move around the bowl, not just the bowl's dimensions. Mark out the footprint of the unit on the floor with painter's tape. Does your stylist have enough room to stand and work comfortably behind it? Can clients easily get in and out of the chair without bumping into other stations? Consider the entire workflow of your shampoo area to make sure your new setup improves efficiency, rather than creating a bottleneck.
Check Your Current Plumbing
Next, it’s time to play detective with your plumbing. You need to understand what kind of plumbing you have—whether your pipes come from the wall, the floor, or the side—before you buy a shampoo bowl. Your dream unit needs to match your actual pipes, or you’ll be looking at a much more complicated and expensive installation. Take a clear photo of your existing water supply lines and drainpipe. Note their location and size. This information is critical when you’re shopping, as it will help you filter your options to only include models that are compatible with your salon’s current setup.
Know Your Local Codes
This step is easy to overlook, but it’s incredibly important. Every city or county has specific plumbing and building codes you need to follow to ensure your installation is safe and legal. Be aware of your local plumbing codes and requirements before you begin. These regulations can dictate everything from the type of pipes you can use to the specific fixtures required for commercial salons. A quick search on your local municipality’s website or a call to the building department can provide the information you need. Following these rules protects your business, your staff, and your clients.
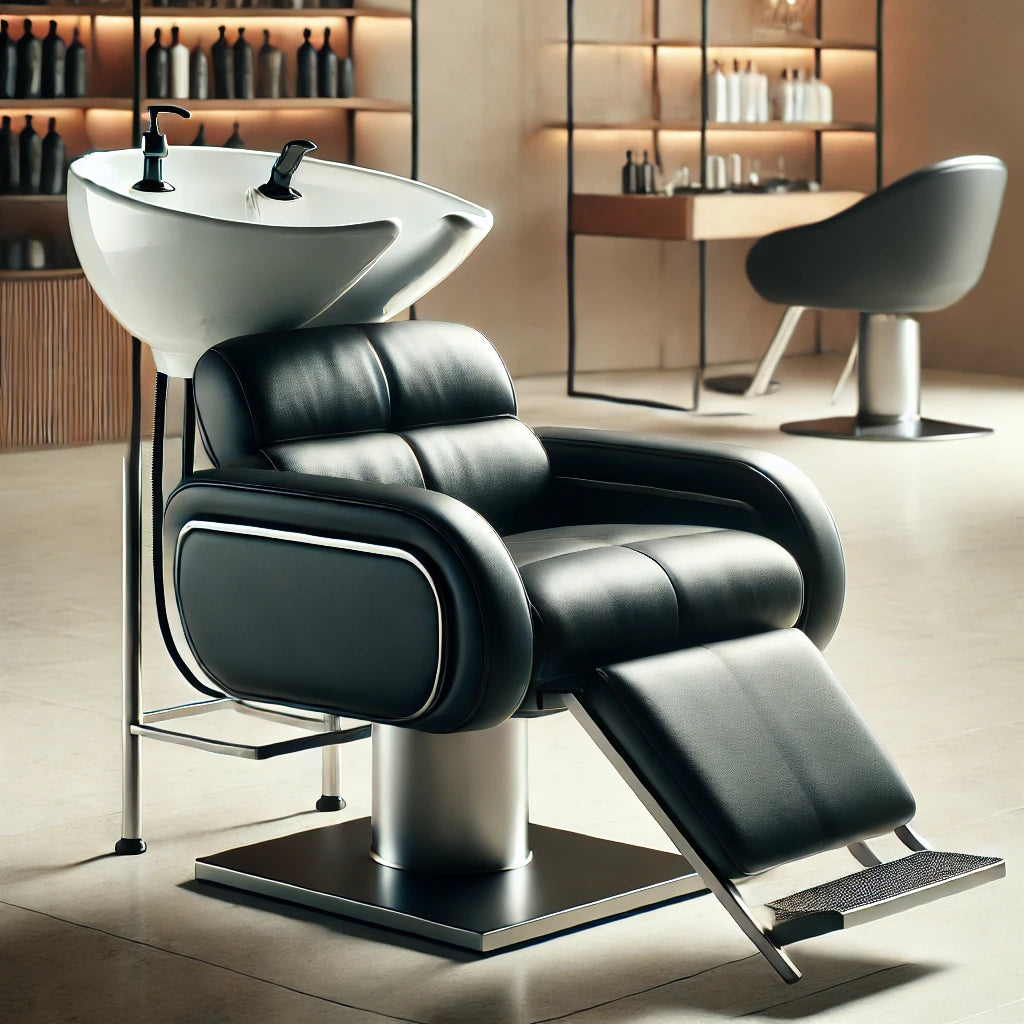
Choose the Right Shampoo Bowl
Now for the fun part! With your measurements, plumbing info, and local codes in hand, you can confidently choose the perfect shampoo bowl. As you browse, consider factors like the type of bowl (freestanding or all-in-one unit), material quality, and ergonomic design for client comfort. Do you want a classic ceramic bowl or a modern fiberglass one? Does the chair offer good lumbar support? Think about your salon’s aesthetic and your budget to find a unit that checks all the boxes. This preparation ensures the shampoo bowl you pick is not only beautiful but also functional and perfectly suited for your space.
What Are the Plumbing Requirements?
Getting the plumbing right is the most important part of installing your backwash shampoo bowl. It’s the difference between a smooth, leak-free operation and a future full of headaches and expensive plumber calls. Before you even think about mounting the bowl, you need a clear understanding of your salon’s existing plumbing setup and what your new unit requires. This involves looking at three main things: how water gets to the bowl, how it drains away, and the pressure behind it all.
Think of it this way: you need to understand what kind of plumbing you have—whether pipes are coming from the wall, floor, or side—before you buy a shampoo bowl. Your dream unit needs to match your actual pipes. Taking the time to sort this out first will save you a world of trouble. It prevents the frustrating scenario of falling in love with a unit only to find out it’s completely incompatible with your space. We’ll walk through exactly what you need to check to ensure your installation is a success from day one.
Water Supply Lines
Your backwash unit will need connections for both hot and cold water. These are your water supply lines, and they are the starting point for any installation. Before you purchase a new shampoo bowl, you must identify where these lines are located in your shampoo area. Are they coming up from the floor or out of the wall? Their position will determine the type of shampoo unit you can install and where it can be placed. Make sure the shut-off valves are easily accessible and in good working condition. If they look old or corroded, now is the perfect time to have a plumber replace them.
Drainage System
What goes in must come out, and in a salon, that includes a lot of hair and product. A proper drainage system is non-negotiable to prevent clogs and backups. Every shampoo bowl installation must include a P-trap, which holds a small amount of water to block sewer gases from entering your salon. More importantly, you should always install a hair trap. This simple device catches hair before it can enter your plumbing and create a serious blockage. Skipping this step is one of the biggest mistakes a salon owner can make, as plumbing repairs can be costly and disruptive to your business.
Water Pressure and Flow
The quality of your client’s shampoo experience depends heavily on good water pressure. Too low, and rinsing out color becomes a chore. Too high, and you risk splashing and discomfort. Most modern salon furniture and fixtures are designed to work within a standard pressure range, but it’s wise to check your salon’s water pressure beforehand. You can buy a simple pressure gauge at any hardware store. It’s also a good idea to install a thermostatic mixing valve, which automatically balances the hot and cold water to maintain a consistent, safe temperature for your clients.
Connection Types
The final piece of the plumbing puzzle is making sure all the parts fit together. Your shampoo bowl will come with specific hoses and fittings, and you need to ensure they are compatible with your salon’s plumbing. For example, the flexible drain hose should come with an adapter that lets it connect to a standard plumbing nut, typically for a 1.5-inch waste pipe. Carefully read the specifications for the bowl you plan to buy and compare them to your existing setup. Just as you'd check the plug type on new styling tools, you need to verify these plumbing connections. You may need to purchase additional adapters or fittings to make everything connect securely without leaks.
Your Step-by-Step Installation Guide
Alright, you’ve planned your space and picked the perfect shampoo bowl. Now comes the hands-on part. Installing a backwash unit might seem intimidating, but it’s completely manageable when you break it down into clear, simple steps. Think of it like a complex haircut—precision and following the process are everything. Before you start, always read the specific installation manual that came with your unit, as details can vary between models. This guide will walk you through the general process, giving you the confidence to get your new station up and running smoothly. Let’s get started.
Step 1: Prep the Area
First things first, let's set the stage for a successful installation. Start by completely clearing the area where your new shampoo bowl will live. You’ll need plenty of room to work without tripping over styling carts or other equipment. Next, and this is a big one, shut off the main water supply to the area to avoid any surprise showers. Lay down some towels or a tarp to protect your floors from scratches and spills. Unpack your new shampoo unit and do a quick inventory to make sure all the parts, screws, and fittings listed in the manual are there. Getting everything organized now saves you from a frantic search for a missing washer later.
Step 2: Mount the Bowl
With your area prepped, it’s time to secure the bowl. Position the base of the shampoo unit exactly where you planned for it to go. Use a pencil to mark the spots on the floor where you’ll need to drill for the mounting bolts. Once your marks are set, move the unit aside and drill the holes. Then, reposition the unit, align it with the holes, and securely fasten it to the floor using the provided hardware. Use a level to make sure the chair and bowl are perfectly balanced. A wobbly unit isn't just unprofessional—it's a safety hazard. Taking the time to mount it correctly ensures a stable, professional setup for years to come.
Step 3: Connect the Water Lines
Now, let's get the water flowing. You’ll be connecting the hot and cold water lines from your wall or floor plumbing to the faucet on your shampoo bowl. Most units come with flexible supply lines. Before you connect them, wrap the threaded ends of your plumbing pipes with plumber's tape (Teflon tape) a few times in a clockwise direction. This creates a watertight seal and prevents leaks. Attach the hot and cold lines to their corresponding inlets on the faucet, then connect the other ends to the water supply valves. Hand-tighten the nuts first, then give them a final quarter-turn with a wrench. Be careful not to over-tighten, as this can damage the fittings.
Step 4: Install the Drainage
Proper drainage is essential for keeping your station clean and functional. This step involves connecting the bowl’s drain to your salon’s main waste line. First, assemble the drain tailpiece and connect it to the bottom of the shampoo bowl. Don't forget to install the hair trap or strainer that came with your unit—this little piece is your best defense against clogs and expensive plumbing calls. Next, connect the P-trap to the tailpiece and then to the main drain pipe in the wall or floor. Make sure all connections are snug and properly sealed with the included gaskets or plumber's putty to create a secure, leak-proof system that can handle daily salon traffic.
Step 5: Test Everything
You’re almost at the finish line! Before you call it a day, you need to test your work thoroughly. Go back to your main water valve and turn it on slowly. Head back to the shampoo unit and inspect every single connection point for drips—check the supply lines, the faucet fittings, and the entire drainage assembly. If everything is dry, turn on the faucet and let both hot and cold water run for a few minutes. Watch the drain to ensure water is flowing away smoothly without any backups. Fill the bowl completely and then let it drain, keeping a close eye on the P-trap and drain connections for any signs of leaks. This final check ensures a relaxing experience for your clients and peace of mind for you.
How Much Does Installation Cost?
Figuring out the budget for your new shampoo station involves more than just the price tag on the bowl. The total cost is a combination of the unit itself, professional labor, and any extra parts or permits your city requires. While the final number can range from a few hundred to over a thousand dollars, understanding each component helps you plan effectively and avoid any surprises. Let’s break down the main expenses you can expect.
Cost of the Bowl
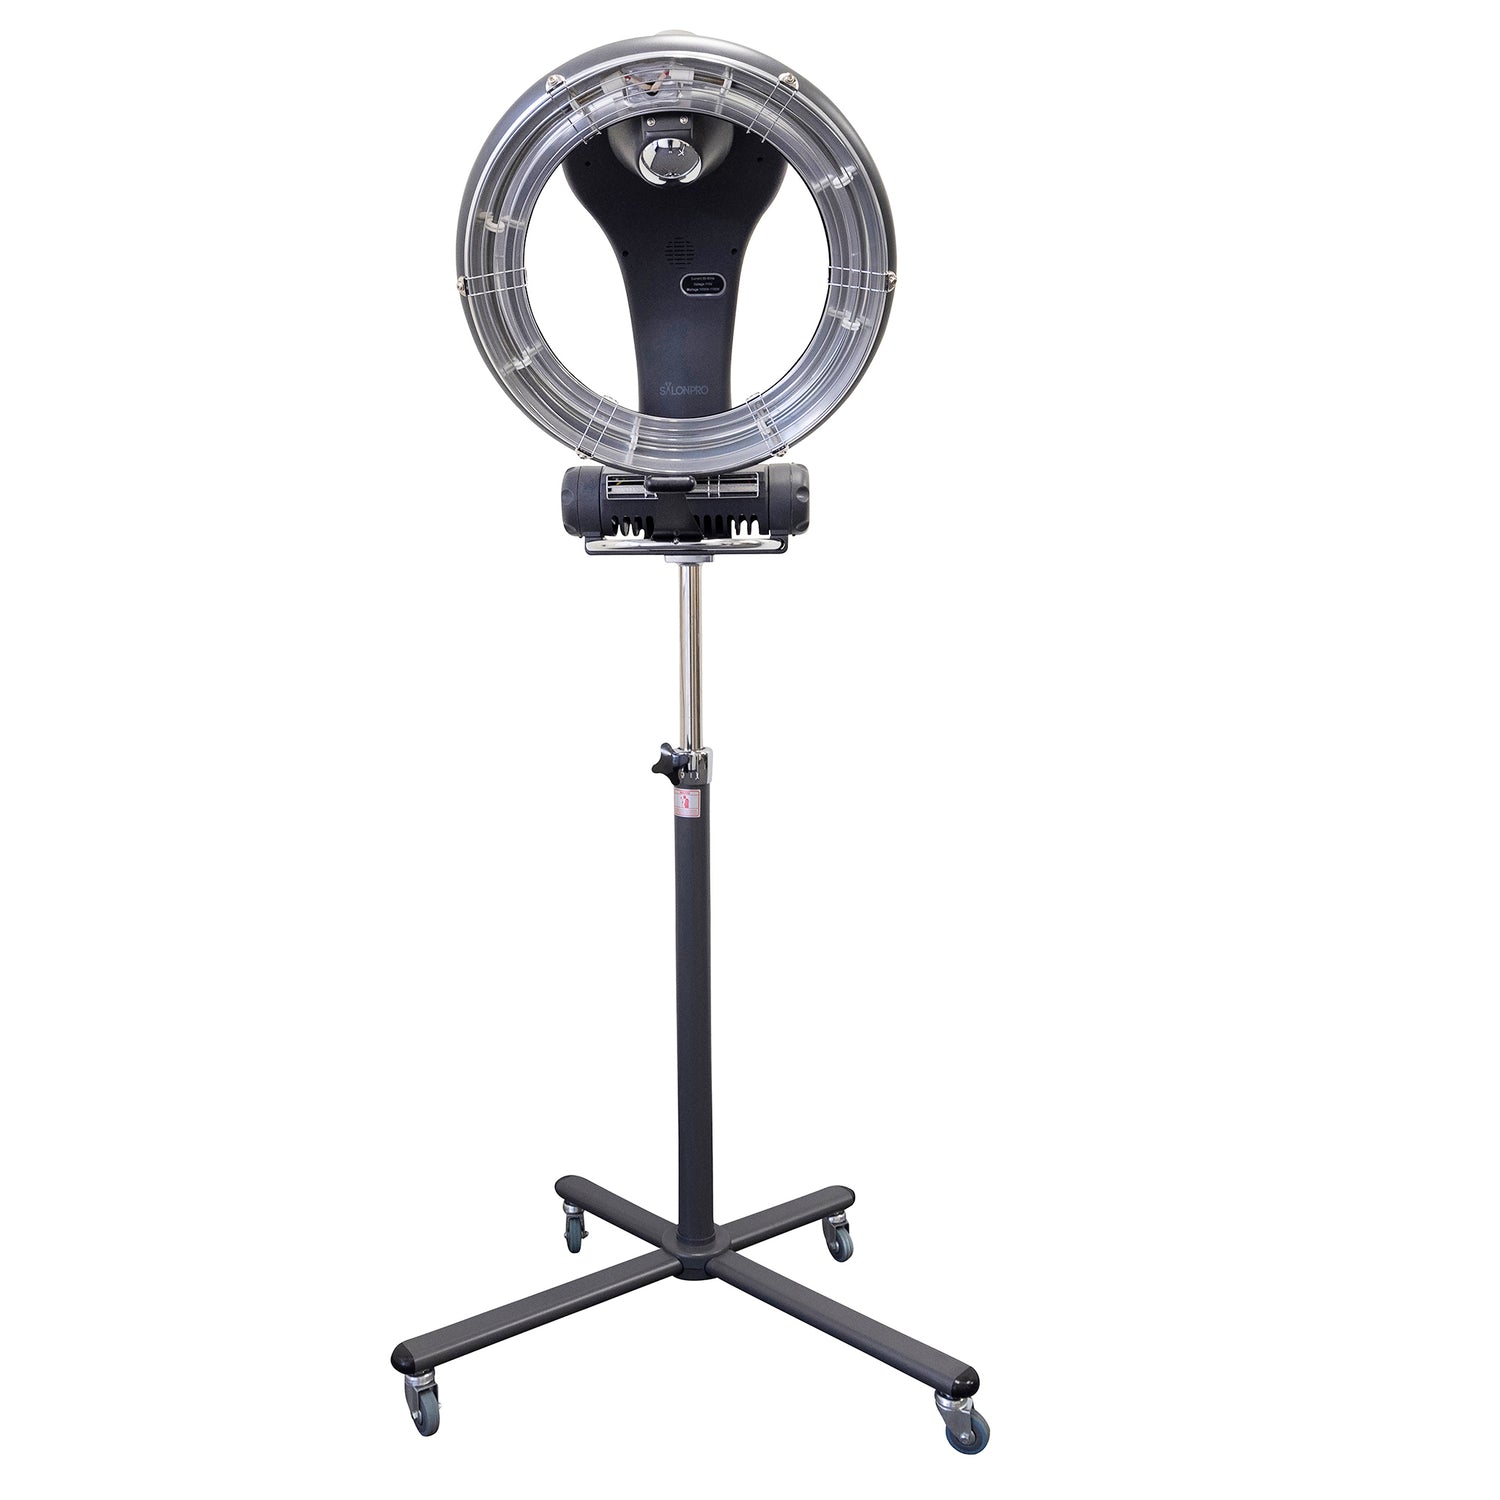
The first and most obvious expense is the shampoo bowl itself. The price here can vary quite a bit depending on the style and features you choose. A simple, standalone pedestal shampoo system might cost between $150 and $250. If you’re looking for something with more functionality, like shampoo units that include a cabinet for storage and a more integrated design, you can expect to pay anywhere from $230 to over $1,000. The material, brand, and overall complexity of the unit all play a role in the final cost, so it’s wise to shop around to find the perfect fit for your salon’s aesthetic and budget.
Hiring a Pro
Unless you’re a licensed plumber yourself, this is one area where you don’t want to cut corners. Hiring a professional, licensed plumber is essential for a correct and safe installation. They ensure your new unit meets all local plumbing codes, preventing potential issues like leaks, water damage, or fines down the road. A pro handles everything from ensuring proper water pressure to correctly installing drainage, saving you time and giving you peace of mind. Think of it as an investment in your salon’s infrastructure and long-term success. Labor costs will vary based on your location and the complexity of the job, so get a few quotes before you begin.
Permits and Extra Materials
Before your plumber can even start, you may need to account for permits and specific parts required by your local regulations. Many areas have strict plumbing codes that mandate components like vacuum breakers to prevent water contamination. It’s a good idea to check with your local building department to see what permits are necessary for this type of installation. Your plumber can often help with this process. Factoring in the cost of these permits and any required materials from the start will help you create a more accurate budget and ensure your project goes smoothly without any regulatory hiccups.
What Affects the Final Price?
The total amount you'll spend is influenced by several key factors. The type of bowl you select is the starting point, but labor costs are a major variable and can differ significantly based on your geographical location. A straightforward replacement of an old unit will generally cost less than a brand-new installation that requires running new plumbing lines. The complexity of your existing plumbing setup and the specific materials needed to meet code will also impact the final invoice. All these elements combined will determine whether your project lands on the lower end of a few hundred dollars or exceeds the $1,000 mark.
Should You Hire a Professional?
Deciding whether to install your new backwash shampoo bowl yourself or call in a professional is a major consideration. On one hand, a DIY approach can save you money upfront. On the other, a professional installation offers peace of mind and protects your investment. This decision often comes down to your budget, your personal skill set, and how much risk you're willing to take on.
Most installation problems stem from poor planning, not necessarily a lack of plumbing skill. If you’re meticulous, confident in your abilities, and have done your homework on local building codes, you might be able to handle it. However, for most salon owners, the risk of a leak, water damage, or an improperly secured unit just isn't worth the potential savings. Let's break down the factors to help you make the best choice for your business.
The Pros of Hiring a Pro
Hiring a licensed, professional plumber is like buying an insurance policy for your salon. You’re not just paying for a service; you’re paying for expertise and security. A professional ensures your new shampoo units are installed correctly and safely, meeting all local plumbing and building codes. This prevents costly future issues like leaks, drainage problems, or code violations that could disrupt your business. A pro has the right tools, understands the nuances of commercial plumbing, and can troubleshoot unexpected issues on the spot. This leaves you free to focus on what you do best—running your salon.
When to DIY
If you have a strong background in plumbing and access to all the necessary tools, a DIY installation might be a viable option. This path is best suited for simpler setups where you’re replacing an existing unit with a similar model and not altering the plumbing layout. Before you start, be honest with yourself about your skill level. A small mistake can lead to significant water damage and expensive repairs that will quickly erase any initial savings. If you’re well-prepared with a solid plan and feel confident in your abilities, you can certainly tackle the project yourself.
How to Find a Good Installer
Finding the right person for the job is key to a stress-free installation. Start by asking for recommendations from other salon owners in your area—they can offer honest feedback on local plumbers they’ve used. Once you have a few names, be sure to check their licenses, insurance, and online reviews. Always ask for a detailed price quote in writing before any work begins. This helps you understand the full scope of the cost and prevents surprise fees later on. A trustworthy installer will be transparent about their pricing and happy to answer all your questions.
Common Installation Mistakes to Avoid
Installing a new backwash shampoo bowl is an exciting upgrade for your salon, but a few common missteps can turn that excitement into a major headache. Taking a little extra time to get things right from the start will save you from leaks, wobbly bowls, and unhappy clients. Think of it as an investment in your salon’s future. By sidestepping these frequent errors, you ensure your new equipment works perfectly and provides a comfortable, professional experience for everyone. Let’s walk through what to watch out for so your installation goes smoothly.
Incorrect Measurements
This might sound basic, but it’s one of the most common slip-ups. It’s not just about whether the unit fits in the designated spot; you also need to account for workflow. How will you and your stylists move around the chair? Is there enough room for clients to get in and out comfortably without bumping into other salon furniture? Before you drill a single hole, use painter's tape on the floor to outline the footprint of your new shampoo unit. This simple trick helps you visualize the space and ensures your layout is practical, not just possible.
Faulty Plumbing Connections
A tiny drip can lead to a huge problem, and most plumbing issues come from rushing the connection process. Every fitting needs to be secure and perfectly aligned. Double-check that you’re using the correct size connectors and apply plumber's tape to create a watertight seal on all threaded joints. Tighten everything until it’s snug, but be careful not to overtighten, as this can crack the fittings. A good rule of thumb is to check for leaks immediately after turning the water on and then again a few hours later to be absolutely sure.
Poor Sealing and Leaks
What you can’t see can definitely hurt you. The hidden parts of your installation, like the seals around the drain and faucet fixtures, are critical for preventing slow leaks that cause water damage and mold over time. Use a high-quality silicone caulk to seal any gaps between the bowl and the wall or countertop. Don’t skimp here—a good seal is your best defense against water seeping into places it shouldn’t. Make sure to let the caulk cure completely according to the manufacturer's instructions before you start using your new shampoo unit.
Wrong Height or Angle
Getting the height and angle of the bowl just right is essential for both client and stylist comfort. If it’s too high or low, clients will experience neck strain, and your stylists will end up with back pain from leaning over awkwardly. A general guideline is to mount the bracket so the top is about 32 inches from the floor, but always check the specific instructions for your model. The goal is to create a comfortable angle for the client’s neck. Before you permanently fix it to the wall, have someone sit in the chair to test the position.
How to Maintain Your New Shampoo Bowl
You’ve invested in a beautiful, professional shampoo bowl—now let’s make sure it stays that way. Proper maintenance is about more than just appearances; it’s about hygiene, client safety, and protecting your equipment for the long haul. A sparkling clean station shows your clients you care about every detail of their experience. The good news is that keeping your shampoo units in top shape doesn’t require a ton of time or effort. By building a few simple habits into your daily and weekly schedule, you can prevent buildup, avoid clogs, and keep your bowl looking brand new for years. Think of it as a small daily investment that pays off by preventing costly repairs and replacements down the road. A well-maintained shampoo bowl functions better, looks more professional, and contributes to a smooth, efficient workflow in your salon.
Daily Cleaning Routine
The key to a spotless shampoo bowl is cleaning it consistently throughout the day. After each client, give the bowl a quick wipe-down with a soft cloth and a mild, non-abrasive disinfectant. This simple step takes less than a minute but works wonders to prevent hair color stains, product residue, and hard water spots from setting in. Avoid harsh chemicals or scrubbers that could scratch the finish. Pay special attention to the faucet, handles, and neck rest. You’ll also want to clear the hair trap or strainer after every wash. This not only keeps your plumbing clear but also ensures water drains quickly, making your job easier and more efficient.
Long-Term Care Tips
To keep your shampoo bowl in pristine condition, schedule a deep clean at least once a week. This is your chance to address any buildup you might have missed during daily wipe-downs. For a gentle yet effective clean, you can use a paste of baking soda and water to scrub the basin. For tougher spots, a mixture of vinegar and water can help dissolve mineral deposits. Once a month, it’s a great idea to flush the plumbing to prevent clogs and keep things smelling fresh. Simply pour a cup of baking soda down the drain, followed by a cup of vinegar. Let it fizz for about 15 minutes, then flush it all down with a pot of hot (but not boiling) water.
How to Troubleshoot Common Problems
Even with regular care, you might run into a few minor issues. The most common problem is a slow drain, which is usually caused by a buildup of hair and product. If you notice water isn’t draining as quickly as it should, your first step is to thoroughly clean the hair trap. If that doesn’t solve it, the baking soda and vinegar trick can often clear minor blockages in the pipes. Another thing to watch for is small leaks around the faucet or drain connections. Periodically run your hand under the pipes to check for any moisture. Catching a small drip early can prevent water damage and a much bigger headache later. Consistent maintenance is truly the best way to prevent most common issues.
Related Articles
- 5 Best Shampoo Bowl with Chair Units (Buyer's Guide)
- Backwash Shampoo Unit: A Complete Buyer's Guide
Frequently Asked Questions
What's the first thing I should do before buying a new shampoo bowl? Before you even start browsing, grab a tape measure. The most important first step is to understand your space and your existing plumbing. Measure the area where the unit will go, but also consider the workflow around it—make sure your stylists have room to work and clients can move easily. Then, take a clear look at your water lines and drainpipe to see if they come from the floor or the wall. Knowing these two things will narrow down your options to only include bowls that will actually work in your salon.
Do I really need to hire a professional plumber for the installation? While it might be tempting to save money with a DIY installation, hiring a licensed plumber is one of the smartest investments you can make. A professional ensures the job is done correctly and meets all local safety and building codes, protecting you from leaks, water damage, and potential fines. Think of it as insurance for your salon's infrastructure. Unless you have significant plumbing experience, calling a pro gives you peace of mind and lets you focus on your business.
What is a vacuum breaker, and is it actually required? A vacuum breaker is a safety device that prevents used or contaminated water from the shampoo bowl from flowing back into the clean water supply. It’s an essential part of a safe and hygienic salon. In most places, plumbing codes legally require a certified vacuum breaker on all shampoo bowls. It’s not just a suggestion; it’s a non-negotiable component for the health of your clients and staff, so make sure your unit has one or that you have one installed.
What's the most common installation mistake I should watch out for? The most damaging mistakes often happen with the plumbing connections. A tiny, slow leak can go unnoticed until it has caused serious water damage. To avoid this, make sure every connection is secure. Use plumber's tape on all threaded fittings to create a watertight seal, and be careful not to over-tighten the nuts, which can crack them. After you turn the water back on, thoroughly check every connection point for drips, and then check again a few hours later.
How can I prevent my new shampoo bowl from clogging? Preventing clogs comes down to simple, consistent habits. The single most effective tool is the hair trap or strainer that comes with your unit—make sure it’s always in place and clean it out after every single client. This stops the vast majority of hair from ever entering your pipes. For long-term care, you can flush the drain once a month with a mixture of baking soda and vinegar followed by hot water to break down any product buildup.